IntroductionWorking with recordsActivity reportsWebhook managementExamplesBatching RequestsOpen records by URL

Introduction

API Reference

The Solve Application Programming Interface or “API” provides clients who have access to some basic programming experience the ability to add, edit, delete and report on data in their Solve accounts without having to go through the Solve web interface. With the API, you can integrate Solve with your web site and other applications you use and create some pretty spiffy custom reports. This level of customization is provided so you can meet your team’s specific needs and automate as much of your work flow as possible. The API is probably easier to use and way cooler than you might think. It’s also quite powerful; you’ll be working with some of the same tools that we use here everyday. The possibilities are only limited by your imagination.

Authentication

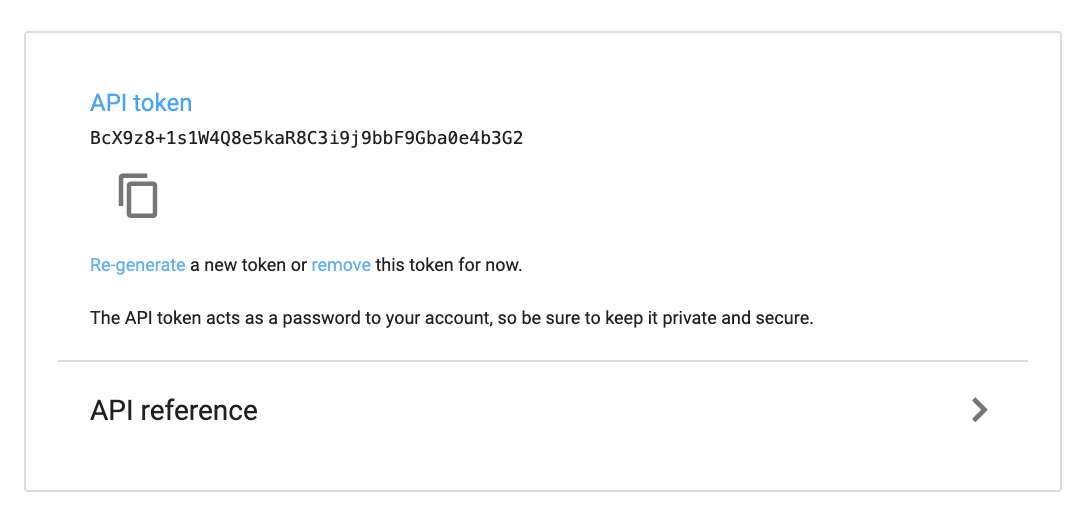
Your code will authenticate to the API as a real Solve user account and will have access to everything that particular account has. However, instead of logging in using the user’s password, your code will use the user’s “API Token”. The API Token can be found under Solve menu > My Account > API Token. Each user account has a unique API Token.

When authenticating via HTTP Basic Authentication (the method we use), you will be prompted for a username and password. Simply enter your Solve email address under username and API Token under password.

Just like your user account’s password, your API Token provides unlimited access to your account. Be very diligent in keeping it secret and remember that the API Token can be removed or value reset at any time under Solve menu > My Account > API Token > Re-Generate a new Token.

Note: Make sure to change this value for any existing scripts which have been deployed to prevent login failures.

Giving it a spin

Type out the following URL in your web browser: https://secure.solve360.com/contacts. When prompted to authenticate, enter a valid Solve user account’s email address and the corresponding API Token. After authenticating, the server should return a list of all contacts that the user’s account has access to. The data is displayed in a machine readable format called XML. Not so hard eh?! Let’s move on to a real-world example…

Creating a new contact in Solve directly from your website’s “Contact Us” form

Let’s start by creating a simple web form to capture the data from a website.

<!DOCTYPE html PUBLIC "-//W3C//DTD XHTML 1.0 Transitional//EN" "http://www.w3.org/TR/xhtml1/DTD/xhtml1-transitional.dtd">
<html>
  <head>
    <meta http-equiv="Content-Type" content="text/html; charset=utf-8" />
    <style type="text/css">
      label, input, textarea { display: block; float: left; width: 150px; margin: 5px; }
      label { clear: left; text-align: right; }
      input[type="submit"] { width: 60px; margin: 10px 0 0 165px; clear: left; }
    </style>
  </head>
  <body>
    <h2>Contact Us</h2>
    <!-- REQUIRED Edit with the filename of the script if different than the example -->
    <form action="Solve360ContactSave.php" method="GET">
      <label>First name (required)</label>
      <input type="text" name="firstname" value="" />
      <label>Last Name</label>
      <input type="text" name="lastname" value="" />
      <label>Job title</label>
      <input type="text" name="jobtitle" value="" />
      <label>Business email</label>
      <input type="text" name="businessemail" value="" />
      <label>Note</label>
      <textarea name="note" cols="4" rows="4"></textarea>
      <input type="submit" value="Save" />
    </form>
  </body>
</html>

http://yourServer/Solve360ContactForm.html

Now, let’s create a script that will receive the completed form from the website, and save the information into Solve. The good news is we’ve already done most of the work for you. You’ll only need to edit two lines indicated by the word REQUIRED with your own account information, while leaving the rest of the code untouched.

Note: We’ve chosen to use only native PHP functions for this example, so you won’t have to install any special libraries on your server. You may prefer to use cURL and send data in XML format. Likewise, since this file contains your API Token, you’ll need to ensure this data is secure i.e. not readable by visitors.

<?php

    // version 2.0

    // All placeholders such as {ownership}, {categoryId}, {templateId} should
    // be replaced with real values without the {} brackets

    // REQUIRED Edit with your email address
    define('USER', 'xxxxxxxx@xxxxxxxx.com');
    // REQUIRED Edit with token, Workspace > My Account > API Reference > API Token
    define('TOKEN', 'xxxxxxxxxxxxxxxxxxxxxxxxxxxxxxxxxxxxxxxxxx');  

    // Get request data
    $requestData = array();
    parse_str($_SERVER['QUERY_STRING'], $requestData);

    // Configure service gateway object
    require 'Solve360Service.php';
    $solve360Service = new Solve360Service(USER, TOKEN);

    //
    // Adding the contact
    //

    $contactData = array(
        'firstname'     => $requestData['firstname'],
        'lastname'      => $requestData['lastname'],
        'jobtitle'      => $requestData['jobtitle'],
        'businessemail' => $requestData['businessemail'],

        // OPTION Apply category tag(s) and set the owner for the contact to a group
        // You will find a list of IDs for your tags, groups and users in Workspace > My Account > API Reference
        // To enable this option, uncomment the following:

        /*        
        // Specify a different ownership i.e. share the item
        'ownership'     => {ownership},

        // Add categories
        'categories'    => array(
            'add' => array('category' => array({categoryId},{categoryId}))
        ),
        */        
        
    );
    
    $contact = $solve360Service->addContact($contactData);
    
    if (isset($contact->errors)) {
        // Mail yourself if errors occur  
        mail(
            USER, 
            'Error while adding contact to Solve', 
            'Error: ' . $contact->errors->asXml()
        );
        die ('System error');
    } else {
        // Get new contact params from the response
        $contactName = (string) $contact->item->name;
        $contactId   = (integer) $contact->item->id;
        
        // Mail yourself the result
        mail(
            USER, 
            'New contact added to Solve', 
            'New contact "' . $contactName . '" with id ' . $contactId . ' was added to Solve360'
        );
    }
    
    //
    // OPTION Adding a activity 
    //
    
    /*
     * You can attach an activity to the contact you just created
     * This example creates a Note, to enable this feature just uncomment the following request
     */    
    
    /*    
    // Preparing data for the note
    $noteData = array(
        'details' => nl2br($requestData['note'])
    );

    $note = $solve360Service->addActivity($contactId, 'note', $noteData);
    
    // Mail yourself the result
    mail(
        USER, 
        'Note was added to "' . $contactName . '" contact in Solve',
        'Note with id ' . $note->id . ' was added to the contact with id ' . $contactId
    );
    // End of adding note activity
    */
 
    //
    // OPTION Inserting a template of activities
    //
    
    /*
     * You can also insert a template directly into the contact you just created
     * You will find a list of IDs for your templates in Workspace > My Account > API Reference
     * To enable this feature just uncomment the following request
     */

    /*
    // Start of template request
    $templateId = {templateId};
    $template = $solve360Service->addActivity($contactId, 'template', array('templateid' => $templateId));
        
    // Mail yourself the result
    mail(
        USER, 
        'Template was added to "' . $contactName . '" contact in Solve',
        'Template with id ' . $templateId . ' was added to the contact with id ' . $contactId
    );
    // End of template request
    */

?>
<!DOCTYPE html PUBLIC "-//W3C//DTD XHTML 1.0 Transitional//EN" "http://www.w3.org/TR/xhtml1/DTD/xhtml1-transitional.dtd">
<html>
    <head>
        <meta http-equiv="Content-Type" content="text/html; charset=utf-8" />
    </head>
    <body>
        <h2>Result</h2>
        <p>Thank you, <b><?php echo $contactName ?></b></p>
        <p>Your data was successfully saved.</p>
    </body>
</html>

http://yourServer/Solve360ContactSave.php

To simplify matters, we’ve created a special library script called Solve360Service.php which contains commonly used functions. It’s required and included in the zip file below.

Let’s test it out! Download Solve360Example.zip > extract the files from the ZIP file > make the necessary configuration changes as described above > upload the three files to your web server.

Open http://yourServer/Solve360ContactForm.html > fill in the values > click Save. If the test works as expected, you will see a response page which would look similar to this:

Thank you, {firstName} {lastName}
Your data was successfully saved.

If the response was successful, you’ve successfully created a contact record. You can confirm by logging into your Solve account. If there were any errors with the transaction, the system would display the relevant information in the response (XML encoded).

What’s next? Try expanding on this example by adding additional fields to your form and enabling the category tags option in the ContactSave.php script.

Just a quick note, you can find a list of all Field Names, Field IDs, Category Tag IDs and Ownership IDs under: Solve menu > My Account > API Reference.

Conventions

Edited for brevity
Replace with your own data { }

Reading data

The API has two types of actions for reading data: LIST and SHOW.

  • LIST returns a collection (e.g. a list of contacts)
  • SHOW returns a single record (e.g. all information related to a specific contact)

These actions are done through the GET verb. You can also view the extracted data directly on a web browser. We recommend using Firefox/Chrome, as it’s renders the XML response in easy-to-read format.

Note: A successful read response is indicated by: ”HTTP/1.1 200 OK”.

Writing data

Actions such as creating, updating, and deleting items through the API is almost as simple as reading, but are not accessible via a web browser. We recommend using cURL to evaluate the methods first, since it’s an easy way to explore the API. It’s perfect for scripts too!

When you’re creating and updating items, you’ll be sending XML into the API and including the XML content in the body of your request. If you prefer to send regular form-encoded data, just let the system know that by adding the header ”Content-type: application/x-www-form-urlencoded”.

Creating data

Creating an item is done via the POST verb. A successful create action displays a ”HTTP/1.1 201 Created” response.

You can read the URI of the new resource in the location header, which is handy if you need to refer to your newly created item. Since you can create a new item, with less than all its regular attributes, the API also returns the complete XML for the newly created item in the response e.g. the record’s new Id and created date.

Updating data

Updating an item is done through the PUT verb and against the URI of the resource you want to update. A successful update action displays a ”HTTP/1.1 200 OK” response.

Deleting data

You can delete items using the DELETE verb. In this case, you won’t need to pass the content-type header because you’re not sending any data. A successful delete action displays a ”HTTP/1.1 200 OK” response.

Dealing with errors

If a request fails, the error information is returned with the HTTP status code:

400 Bad Request The request was invalid. An accompanying error message will explain why. This is the status code will be returned during rate limiting.
401 Not Authorized Authentication credentials were missing, incorrect, or the authenticated user does not have access to make this request.
403 Forbidden The request is understood, but it has been refused. An accompanying error message will explain why.
404 Not Found The URI requested is invalid or the resource requested, such as a contact, does not exists.
406 Not Acceptable Returned by the Search API when an invalid format is specified in the request.
500 Internal Server Error Something is broken on our end. Please contact our support team to investigate.

API limit

Clients may request up to 12,000 API calls every 24 hours. Most clients will never hit this threshold, but those that do will result in a reply with an error status code of 403. We encourage developers to anticipate this error, and take appropriate measures. API responses return the current app’s call limits in the response headers:

Http-X-Solve360-Api-Call-Limit: 11/12000

Note: Inserting a template of activities counts as one for the main call and one for each activity inserted.

If you’re concerned about the API limit consider integrating Webhooks into your solution.